Conditional code compilation in Java

In C/C++ there is a construct which allows you to conditionally compile code. Yes I am talking about the #ifdef... #endif Java doesn’t have an equivalent. But you can use the following clever trick to achieve the same functionality.

Why conditionally compile code?

So before we proceed, you might ask me, why we need to do conditionally compiling? There are couple of reasons, but the main reason which motivated me to look for the solution is to conditionally enable debug statements. You can say that we can probably use a boolean variable or a function call, to determine whether we need to output the debug statement or not. But if the number of debug statements is high then they could add up.

Setting up final boolean variable

So the trick is simple. You have to create a if statement with a boolean private variable and if you  make the boolean private variable as final and set the value to false, then at compile time, the compiler will be able to determine that these code branches are unreachable and will not include them as part of the compiled code.

Sample Code

The following sample code explains this trick.

Posted in Android/Java | Tagged , | 5 Comments

Travelling to Malaysia

I recently went to Malaysia for vacation and thought of sharing my experience here, like my other trips so that it would be helpful for those who are planning for a similar trip.

Itinerary

April 20th (Day 0)

Took flight at 6:00 PM (IST) and reached Kuala Lumpur at 00:30 AM (MST) the next day.

April 21st (Day 1)

Sight seeing in Kuala Lumpur. Saw Petronas Twin towers and KL tower.

Went for a trek and ATV driving in the nearby forests. (Would be writing more about it as a separate blog post)

Took the train to Arau in the night

April 22nd (Day 2)

Arrived at Arau and went to Kuala Perlis to board the ferry to Langawi.

After reaching Langawi, hired a rental car to go around the island.

Water sports at the beaches of Langawi. (More about it in a separate blog post)

Spent the entire day at beach

April 23rd (Day 3)

Went for Island hopping.

Shopping at Langawi and it was duty free 😉

Boarded a ferry back to main land. And then boarded a bus back to Kuala Lumpur.

April 24th (Day 4)

Some more shopping in Kuala Lumpur.

Tried various cuisine’s.

April 25th (Day 5)

Went to Batu Caves

Packed up stuff and went to Airport.

Boarded flight from Kuala Lumpur, back to Chennai.

Getting Visa

Till last year, it seems that you can get an on-arrival visa for Malaysia. But now they have cancelled that for India and you have to get a visa before you travel.

I got my visa through Thomas Cook and it took me around 4-5 business days and the fees was Rs. 1300

You would need the following documents as well

  • Your Passport
  • Copy of Address proof
  • Copy of your tickets
  • Leave letter (if you are working somewhere)
  • A covering letter

When you are applying for the visa, mention that you want multiple entry visa and generally you will get a multiple entry visa, which would be useful if you are planning to visit other South East Asia countries as well

Foreign Exchange

The official currency of Malaysia is Ringgit. So you would need to get them before you travel.

In Malaysia most of the hotels don’t accept credit cards and you might have to pay by cash. So it is better to carry cash with you.

If possible try to avoid getting your money exchanged in Thomas Cook. They were quite costly. Try to get it from some small but authorized money exchanges or banks. You might get some good exchange rates. Also try to avoid getting money exchanged at Airport. They were extremely costly and were nearly 40-50% higher.

An alternative is to use your international debit card in the ATM there to get cash. My ICICI bank debit card worked there and the exchange rate was also good. But it seems that Malaysia comes under a list of countries where card tampering happens and after coming back to India I got a call from ICICI customer care and they replaced my debit card. The same thing happened with my credit card as well. So if possible don’t use your primary card there.

To exchange money you would need the following documents

  • Your passport with visa
  • Your tickets

Also don’t forget to keep the receipt given by the money exchanger with you. Sometimes you might need it, especially in customs.

Air tickets

I booked my tickets though AirAsia and they turned out to be extremely cheap. They also have a couple of offers for other South East Asian countries as well. Check their rates before you book your tickets with other airlines.

Also for return tickets make sure you buy some extra baggage as well. Believe me, Malaysia is a great place for shopping and you might end up with lot of bags. In fact, I ended up buying separate bags to get back the stuff which I bought there 😉

It takes about 3.5 – 4 hours by flight to reach Malaysia from Chennai.

Climate

I went during the month of April and it was extremely sunny. So those of you who are worried about your skin, don’t forget to carry Sun screen creams 🙂

While talking with the local people I came to know that the climate is same pretty much the entire year. So you may not need winter clothes while travelling to Malaysia.

Time Difference

Malaysia follows MST time zone, which is UTC + 8 hours. So when you compare it with India, they are 2.5 hours ahead.

If it is 2 PM in India, it would be 4:30 PM in Malaysia.

More Updates

Over the next couple of days, I would continue to write about my experiences so stay tuned 🙂

Posted in Travel/Trek | Tagged , | 5 Comments

Trip to Savandurga or the fort of death

Long time readers of my blog would know about my love for travel especially long bike trips. This past weekend me and Aswin along with a couple of friends planned for a trip to Devarayanadurga. But then we came to know that there was some local festival in that area and after some drop-outs, three of us (me, Aswin and his roommate) finally decided to go to Savandurga.

Bike Ride

We started at around 6 AM on Sunday and started driving towards the nice road. From Nice road we went to Mysore road. After crossing Wonderla we stopped for having breakfast. From Mysore road we took right towards Magadi Road and reached Savandurga at around 9:00 AM.

Climbing to the top

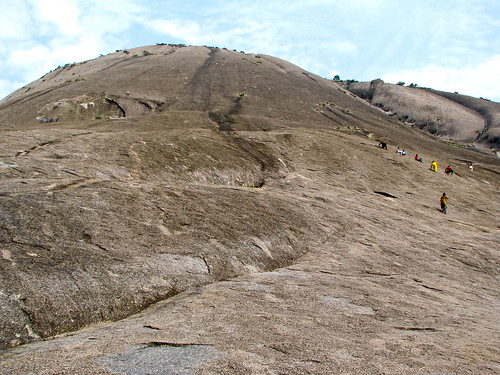
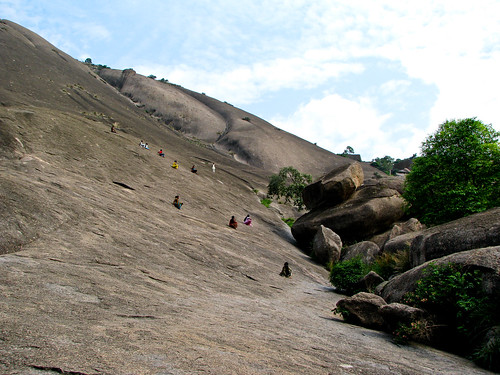
The main speciality of Savandurga is that it is one of the largest monolithic rocks in the world. It is very smooth and bald and is very difficult to climb since you have no steps or support. You have to literally walk, climb, roll or crawl to get to the top.

Savandurga Savandurga

On the way you also have to pass through some caves, trees, ruined forts and patches of long grass. There are markings in the rock which shows you the trail that you have to follow.

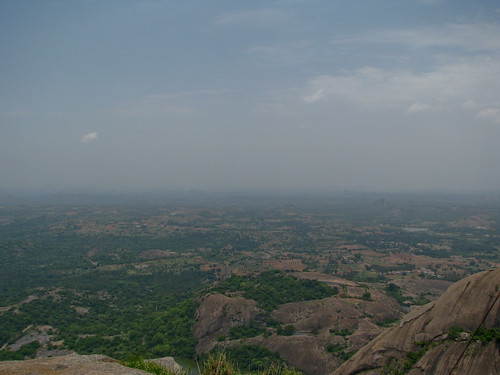
We started climbing at around 9:30 AM and reached the top at around 11:00 AM. By the time we reached top, we were tired but the view from the top was really worth it.

Savandurga Savandurga

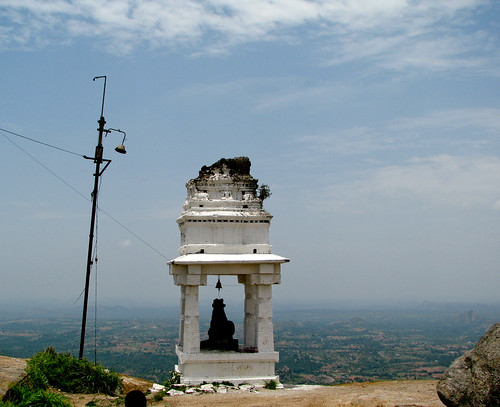
There is also a small structure on the top with a Nandi statue.

Savandurga

Getting down

We spent around 90 minutes on top and after a couple of photo-shoots, we started to climb down at around 12:30 PM. Climbing down was tougher than climbing up, since it was very steep and you don’t have much to grab on.

It took us around an hour to climb down and once we were down, we clinched our thirst by drinking lot of tender coconuts.

Drive back

While coming back we came through the Magadi Road and reached city at around 3:30 PM.

It’s a nice place for a one day trip/trek. Climbing the hill was a nice experience and the view from the top makes it really worth it.

Photos

You can also check out the other photos which I took from my Flickr page.

PS: I went for a trip to Malaysia towards then do April and I am yet to blog about it. Will do it soon once I get some free time.

Posted in Travel/Trek | Tagged , , , | 2 Comments

Updated 4 WordPress Plugins

Over the past week, I have updated 4 of my WordPress Plugins and thought of consolidating all of them in a single post instead of creating multiple posts.

Posts By Tag

Posts by Tag WordPress Plugin, provides sidebar widgets which can be used to display posts from a specific set of tags in the sidebar.

I updated this Plugin to v1.7. It fixed a bug so it’s a mandatory update.

The following are the main changes

  • Added support for displaying post dates
  • Fixed a bug which was corrupting the loop.

Twitter Avatar Reloaded

Twitter avatar reloaded Plugin adds a new field to the comment form to get the user’s Twitter username and stores it together with comments and using it replaces gravatar with twitter avatar when the comment is displayed.

I updated this Plugin to v0.7. It is a mandatory update.

The following are the main changes

  • Added 4 template functions to display the comment authors Twitter id and profile url.

Bulk Delete

Bulk Delete is a WordPress Plugin which can be used to delete posts in bulk from selected categories or tags. This Plugin can also delete all drafts, post revisions or pages.

I updated this Plugin to v1.3. It is an optional update

The following are the main changes

  • Added German translations

Easy Retweet

Easy ReTweet is a WordPress Plugin, which lets you add retweet or Tweet this buttons for your WordPress posts, together with the retweet count.

I updated this Plugin to v2.4. It is an optional update

The following are the main changes

  • Added German translations

Stay updated

I would be posting updates about this Plugin in my blog and in Twitter. If you want to be informed when new version of this Plugin is released, then you can either subscribe to this blog’s RSS feed or follow me in Twitter.

Posted in Plugin Releases | Tagged , , , , , | 11 Comments

JoystickShield Library for Arduino

I recently bought the JoystickShield for Arduino from Sparkfun and after playing around with it for a while, I realized that we don’t have a good Arduino library to interface with the JoystickShield. As it always happens with me, I ended up creating one 🙂

Features

The library supports the following events

  • All 8 directions of Joystick. (Up, RightUp, Right, RightDown, Down, LeftDown, Left and LeftUp)
  • Joystick button press
  • All 4 button press (Up, Right, Down, Left)

JavaScript influence

While designing the interface for the library, my JavaScript skills influenced me and I have added callback function support for all the events, in addition to the normal mode.

If you are wondering how I added support for callbacks in C/C++, then the answer is that I implemented them using function pointers. I would probably write an article explaining about it when I find some time. Meanwhile you can check the source code or check out the callback example sketch to find out how to use them.

More details and Download

You can find more details about the library at its homepage and can download it from github account. There are also examples in the /examples directory from which you can find out how to use the library in both the modes.

Try it out and let me know if you have any feedback/comments.

PS: BTW this is my first Arduino based library 🙂

Posted in Arduino | Tagged , , , | Leave a comment

Finding the song/track which is currently playing in Android

For my iAndroidRemote project, I had to find the currently playing song/track in Android phone and the ability to change to next/previous song/track.

After some digging, I found that there is no documented way to do it. It depends on an undocumented way which may not work well in all Android phones.

I found an undocumented way which works for HTC phones and some other stock Android phones that are using the default music player.

I thought of sharing the code here, so that it would be useful for others and also I would know where to look for it when I need it for the next time.

Copying the aidl files

Any Android app, can play music by using the com.android.music.MediaPlaybackService class. In order to find the currently playing song, we need to create a Service which will interact with this class

In order to do that, we need to copy the IMediaPlaybackService.aidl file from the source code of the default music app. For HTC phones we need to copy the IMediaPlaybackService.aidl file inside the com.htc.music package and for other Android phones we have to copy it from the com.android.music package.

Create the following packages to your android project.

  • com.htc.music
  • com.android.music

Copy the com.htc.music.IMediaPlaybackService.aidl and com.android.music.IMediaPlaybackService.aidl files to the newly created packages.

Creating the ServiceConnection class

The next step is to create the ServiceConnection class which will allow us to interact with the MediaPlaybackService class.

Copy the following code and create the MediaPlayerServiceConnection inside your activity as an inner class.

We are using the boolean isHtc to determine if we are on an HTC phone. We would be using this flag before invoking the methods on the ServiceConnection class.

Getting the current song

Now we can call the getTrackName() method on the corresponding object and we can get the track information.

Playing next song

To play the next song in the track we have to just call the next() method on the corresponding object

Playing Previous song

To play the previous song in the album we have to just call the prev() method on the correct object

I have created a small sample project to show the entire flow in action. You can download the project from my Github page.

Posted in Android/Java | Tagged , , | 17 Comments

Adjusting the volume in Android through code

For my iAndroidRemote project, I had to adjust the volume of my Android phone. I found the code after digging around a bit.

I thought of sharing the code here, so that it would be useful for others and also I would know where to look for it when I need it for the next time.

Changing the volume in Android is pretty easy. You just need to know which class and method to call.

Getting the AudioManager Instance

First you have to get an instance of the AudioManager. You can get it by calling the getSystemService method of the Context object. If you are inside an Activity, you can get the instance by making the following code

Once you have the AudioManager instance, all you have to do is to call the adjustVolume method with appropriate arguments.

Increase Volume

To increase the volume you have to pass the AudioManager.ADJUST_RAISE constant.

Reduce Volume

And to reduce the volume you have to pass the AudioManager.ADJUST_LOWER constant.

I have created a small sample project to show the entire flow in action. You can download the project from my Github page.

Posted in Android/Java | Tagged , | 7 Comments

Trip to Siddara Betta – The most memorable day of my life

Regular readers of my blog would know that I love to travel/trek, but I seldom write about them here. But this trip was a completely different experience for me and I couldn’t resist writing about it.

So let me tell you how things started, what the original plan was, how things changed and how it became one of the most memorable days of my life.

The original Plan

Me and my friend Aswin, planned for a trip to Siddara Betta after seeing the trip log of a traveller. After some quick planning we decided that 5 of us (including me and Aswin) will meet near Old Airport road at around 5:30 AM on Saturday morning. Our plan was to take NH4 (National Highways 4) till a place called Dobbaspet (before Tumkur) and then take the Koratgere road to Siddara Betta.

The original trip log specified that there is a temple and some caves on top of a small hill. We decided to climb the hill, visit the temple and cave and then get down by around 3 in the afternoon and reach Bangalore around 6 in the evening. This sounded too easy and we even joked that it is going to a mini-picnic instead of being an actual trek.

Initial surprise

On Saturday early in the morning, I reached the spot where we agreed to meet and was waiting for Aswin and others. He and his other friend Shiven joined a little later but with a little surprise. We had a new *surprise* member 😉 So instead of 5 we are now 6 people with 3 bikes and it sounded perfect.

After a little round of “Hi’s and hello’s” we started around 6:30AM and took NH4 and started racing towards Tumkur. It was a slightly cloudy lazy Saturday morning, with little traffic which was perfect for bike riding. After around 30 KM, we decided to have our breakfast in a hotel near Dobbaspet. We had a decent breakfast and after taking turns to pull each ones legs, I got some opportunity to showcase my Hindi skills. 😉 (Hopefully others didn’t forget their Hindi after hearing my version)

Lost and found 1

So our first adventure started a little while after breakfast. We reached Dobbaspet and after asking around (in Aswin’s broken Kannada and my own version of Hindi) found the correct turn to Koratgere road and started driving in it. After a few meters, we realized that Shiven was missing. After a couple of phone calls, we found that he got lost. We gave him the directions to get back to the correct route and waited for him. Meanwhile we started our photo-shoots and started clicking some nice photos by posing around our bikes. Shiven finally reached after 45 minutes and we started our journey again.

Climbing the hill

After another round of photo-shoots on the way we reached Siddara Betta at around 12. We parked our bikes inside a shed and left our bags and jerkins in a shop and started to climb the hill. The climb was slightly difficult since it was a little steep and the Sun also was very hot. It took us around an hour to climb the hill and after reaching the top. After reaching the top, we rested for a while and then visited the temple. The temple has a cave from where water from an underground stream was flowing. The water was very cold and refreshing. After playing around in the water by flashing it around each other we decided to visit the caves, where our next adventure was waiting.

Lost and found 2

We entered the cave by crawling on all four and reached a spot where there were lot of small rocks which were stuffed closer to each other, with lot of gaps in between them. Aswin was leading us with his torch and while jumping from one rock to another, he dropped his torch. Aswin and Shiven climbed down the rocks to search for it, while I stayed on top to pull them out once they are done. We were not able to see each other but were able to only hear our voices. The search took us around 45 minutes and finally we managed to find both the parts of the torch and 2 out of the 3 batteries. After successfully finding the torch we celebrated it by resting on top of the rocks followed by a photo-shoot with 127 hours as theme 🙂

Losing my bike key

After coming out of the cave, we climbed the hill a little more to reach the peak, where there was a flat ground and a small lake. While relaxing near the lake, I suddenly realized I didn’t have my bike key with me. I quickly checked the bag I was carrying, but couldn’t find it.

We then went back to the temple and cave to see if we can find the key, but it was not there. The local people who were selling toys on top of the hill told us that the nearest place where we can get a mechanic who could try to open the lock without the key will be at least 7 km from the base of the hill.

We quickly started to get down the hill and I was getting down with a big heart 🙁

Travelling to the nearest village to get help

After getting down the hill (mostly silently), me and Aswin started towards the nearby village in two bikes to try and get a mechanic who could try to open the lock without the key. We spoke to a couple of guys, but they all said that it is very difficult to unlock, especially Yamaha bikes.

We returned to the base of the hill empty handed (actually with a kg of apples since everyone were hungry). By that time shiven found a local mechanic who tried to break the lock using brute force. When I saw him swing my bike’s handle and hit the lock with a screw driver, my heart skipped a beat. I decided that it is not going to work and asked him to stop it. I simply couldn’t see my bike getting manhandled. It was a gruesome scene and my heart couldn’t take it any more 🙁

We were running out of options and I started considering the possibility of returning to Bangalore by bus or a cab. We couldn’t get any cab or a call taxi (or any vehicle for that matter) and the nearest bus stop was around 15 KM away.

I kind of accepted the situation and decided to return to Bangalore by bus and go back there the next day with the duplicate key which I had at home and get my bike back. Aswin and Shiven accepted to drop me and my friend in the bus stop by going in triples in the bike.

Finding the key

Just as we were about to leave, the shop keeper with whom we left our bags in the afternoon called my friend and asked whether we were looking for a key. And when we said yes, she handed over a key and guess what, it was my bike key.

I then spent a couple of nervous seconds, when I tried to unlock my bike again. The mechanic, when he tried to unlock, has damaged the lock and I was not sure whether it will unlock or not. After a couple of tries, the key went in and I was able to unlock and start my bike again.

You could never imagine the joy I felt at my heart. It was like getting back your loved one after you thought you lost them. I hugged my bike and promised her that I will not do that again.

We started from there after a few minutes of celebration. It was almost 6 and it started to get dark.

Lost and found 4

After travelling around 20 KM, Aswin realized that he was not having his camera with him. He started searching for it and couldn’t find it.

He called me to find out whether the camera was with me. And after some searching I found that it was with me.

So Aswin’s camera became the 4th object which we lost and then eventually found 😉

Lost and found 5

I was driving a little slow because the road was really bad and there were lot of insects that were getting attracted to my bike’s light. The others went ahead of me and in my attempt to concentrate on the road, missed a turn and took a completely wrong way.

After driving around 10 KM, I got a call from Aswin and I realized that I am lost 🙂 I took a U turn and after asking for directions with a couple of people, finally managed to get on to the correct route and met Aswin and others who were waiting for me.

So I, together with my bike, became the 5th person/item to be lost and then eventually found 😉

Reaching city and traffic

After that, we reached NH4 and then started to enjoy the drive till we reached city limits. Once we reached the city limits, we got struck up in traffic. It was slightly irritating but then we eventually reached a restaurant in Church St, where we had dinner. By the time, I dropped my friend and reached home it was around midnight.

I went to bed extremely tired, but with a completely refreshed mind and with the thought that I just had a most memorable day of my life, which I couldn’t forget for a long time 🙂

So guys, if you have reached here, then thanks for staying with me and reading about my experience. I know it’s pretty long 😉

As I told you, I seldom write about my travel/trek experiences here. Let me know if you guys really like to read about them. I will try to write more about my travel experiences here 🙂

Till then thanks for reading such a long post and do let me know what was your most memorable day in life till now.
Posted in Travel/Trek | Tagged , | 23 Comments

iAndroidRemote – Control your Android phone using Apple Remote

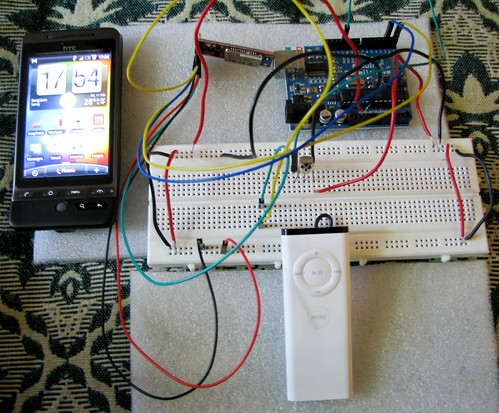
Long time readers of my blog, would know that I hack around Arduino. Couple of days ago, I was playing around with Arduino while listening to music from my Android phone. I wanted to increase the volume of the song that was playing.

At that moment an idea struck me and I thought it would be cool if I can control the volume using some kind of remote. I opened my bag and found an old Apple remote.

Couple of hours later, I was continuing hacking around Arduino, listening to music from my Android phone, but now if I had to change the volume or change the track, I don’t have to reach for my phone, I can do it using my Apple remote itself 😉

iAndroidRemote

If you want to know more about how I did it, or want to try it out yourself, then head over to the project page, where I describe the entire process including the schematics and the source code for both Arduino and Android that I am using.

Try it out and let me know how it works for you. Happy hacking 😉

Posted in Android/Java, Arduino | Tagged , , | 5 Comments

Changed the permalink structure of my blog

Well, after wanting to do it for many years, I have finally bitten the bullet and have changed the permalink structure of the posts in my blog.

When I moved from blogspot to WordPress, (some 6 years ago) I retained the structure of the blog posts to the usual year/month/date/postname format. But later, I realized that this results in long urls and also these days the date is not adding any additional information to the blog posts.

I have been thinking of changing the permalink structure to the shorter /postname format for quite some time now, but was always worried about setting up the proper 301 redirects.

But at last I did it today, with just one line in my .htaccess file, which looks something like this.

So if you are planning to change your permalink structure then follow these steps.

  • Disable caching. (If you using Plugins like wp-super-cache etc.)
  • Add the above line to your .htaccess file
  • Change the permalink structure
  • Re enable cache

And you are done. 🙂

If you want you can also create a new sitemap.xml file which could speed up the index update by Google.

Posted in WordPress | Tagged | 1 Comment